Grilling Gluten-Free Pizza Dough

Grilled pizza is phenomenal! Once you grill pizza, you will not want to cook it any other way. I’ve been known to even grill a frozen pizza.

Our new favorite gluten-free dough is from Sal’s Pizza.  It is gluten-free, dairy-free, soy free and nut free. I’m not getting paid for praising them, it is my own opinion and what I actually feed my family.

Sal’s GF dough is just like non-GF pizza dough, but slightly more finicky. It is better to handle than all the other GF doughs I have tried. It is pliable enough to be rolled out and moved to a sheet pan. As the directions on the packaging state, you just need to put some cornmeal down on the pan, so the dough doesn’t stick. One ball of dough will make two 14 inch pizzas.

I recently discovered an easier way to cook the dough on the grill. Have you ever tried to grill pizza dough, throw it on the grill and it folds up and sticks to the grill surface? I have. Many times. This method has revolutionized my pizza grilling. No more folded dough on the grill!

I start by placing the sheet pan with the dough on it, directly on the grill. Close the grill and cook until bottom of dough is firm and no longer sticky.

Then I take the pans off the grill and spray the top of the dough with cooking spray. Using a spatula (and my hands – don’t burn yourself!) flip the dough over onto the grill for a couple of minutes.

Then using a long spatula or a pizza slide, flip it back onto the sheet pan.

Top with sauce, cheeses and your favorite toppings before moving the sheet pan back onto the grill. Close grill and cook until cheese is bubbly and melted.

This is really easy and gives you that great smoky taste of the grill. If you don’t have a favorite GF pizza dough try using the Against the Grain crust directly on the grill (also a family favorite and no, they are not paying me to say so) or your favorite GF frozen pizza. We are Freshcetta fans.

My son, who has celiac disease, LOVES pizza. He has always loved pizza and with grilling the pizza, no one in the family feels like they are missing the gluten. Some of my family’s favorite toppings include: cheeseburger pizza,  marinated rainbow carrots (don’t knock it, until you’ve tried it!), meatballs, salami and broccoli, olives, sausage or ham and pineapple or just cheese. Lots and lots of cheese.

Easy Grilled Gluten-Free Pizza

Easy method of grilling your favorite gluten-free pizza dough! 

Servings 8

Ingredients

  • 1 ball Sal’s gluten-free pizza dough
  • 2 teaspoons cornmeal
  • ½ cup canned tomato sauce
  • 8 ounces mozzarella shredded
  • 8 ounces cheddar shredded
  • ½ teaspoon oregano
  • Salt and pepper to taste
  • 3 to 4 leaves fresh basil torn
  • Toppings optional

Instructions

  1. If dough is frozen, defrost (at least 2 to 3 hours on counter or overnight in fridge).
  2. Take two sheet pans that will fit on your grill side by side (or cook one at a time) and sprinkle with cornmeal.
  3. Cut dough ball in half.
  4. Lightly flour surface and the rolling pin, roll out the dough to about 1/8th inch thick and place on prepared sheet pan.
  5. Heat grill to high heat.
  6. Prepare all your ingredients and tools near the grill. Have sauce, cheese, seasonings and any toppings you want to use, ready. Also make sure you have oven mitts for handling the hot sheet pans, cooking spray, a spatula and a pizza slide (if you have one).
  7. Place both sheet pans (or one at a time) on the hot grill and close the top. Grill for about 6 minutes, until the dough is firm.
  8. Remove pans from grill and place on temperature safe surface.
  9. Spray tops of dough with cooking spray and using spatula and your hands, if cool enough, flip dough over, directly onto the grill. Close and cook for about 5 minutes.
  10. Using your spatula or a pizza slide, flip dough over, off of grill, back onto sheet pan.

  11. Add sauce on each pizza, cheeses, oregano, salt and pepper. Add any toppings you want.

  12. Place sheet pans back on the grill. Close grill and cook for another 5 to 6 minutes or until cheese is bubbly and melted.

  13. Take off the grill, top with fresh basil and serve!

Meat Lovers Chili

When it’s cold outside, there is nothing better than coming inside to a hot bowl of soup, stew or chili. Whether cooking for the big game or a big family gathering, chili is always a hit. This meat lover’s chili is warm, inviting and delicious. You can make it in advance and keep it warm in a crock pot. You can make it the day before and let the flavors develop. You can make it with meat or without. There are so many options.

Meat Lovers Chili

Ingredients

2 pounds of ground meat (half ground sirloin, half ground pork loin)

2 Tablespoons of olive oil

1 teaspoon of salt

½ teaspoon cumin

1 Tablespoon of chili powder

Pinch of cinnamon

½ cup of lentils

1 pound 13 ounce can of red kidney beans

2 Tablespoons of olive oil

1 cup of chopped baby portabella mushrooms

1 cup of carrots, chopped

1 large sweet onion, diced

2 cloves of garlic, minced

½ teaspoon of salt

½ teaspoon of pepper

3 Tablespoons of brown sugar

3 Tablespoons of chili powder

¼ cup of ketchup

1 Tablespoon of soy sauce

1 Tablespoon of Worcestershire sauce

1 Tablespoon of cider vinegar

splash of chipotle hot sauce (more if you want it spicier), optional

Directions

Sprinkle meat with salt, cumin, chili powder and cinnamon. Heat olive oil in pan and sear meat. Cook through, remove from pan and drain oil. Turn crock pot on high. Add cooked meat, beans and lentils into crock pot. In same pan that meat was cooked, add olive oil, mushrooms, carrots, onions, garlic, salt, pepper, brown sugar and chili powder. Sauté about 5 to 7 minutes until onions are soft and translucent. Stir in ketchup, soy sauce, Worcestershire sauce, cider vinegar and hot sauce, then pour into crock pot. Mix it all together and then close the lid. Cook on high for 4 hours.

This is one of those recipes that is even better the next day. I like to serve chili with guacamole, sour cream, cheddar and fresh cilantro. You can put each of the toppings out and let everyone build their own.

If you prefer vegetarian chili try my Pumpkin Quinoa chili. What is your favorite chili, stew or soup to warm up with? Check out some of my favorite soups.

Meal Planning: Basic Instant Pot Chicken and Roasted Vegetables

A little meal planning goes a long way. I try to plan our meals for the week the night before I go grocery shopping, so that I can make my list dependent on what I’m going to cook that week.

On weekends, I try to cook extra items to make our meal preparation for busy weeknights easier. I received an Instant Pot for Christmas. It is a great too for meal prepping.  Either I make dinner in the instant pot, while I make the meal for other nights on the stove or vice versa, make the meal for later in the week in the Instant Pot while I cook our dinner on the stove.

Here are a couple of easy recipes that will make multiple meals.

Basic Chicken Breasts in the Instant Pot

Marinade:

Ingredients

About 3 pounds of chicken breasts

5 Tablespoons lemon juice

3 Tablespoons vegetable oil

1 teaspoon of salt

½ teaspoon of pepper

1 teaspoon of garlic paste or 1 clove of garlic, minced

1 Tablespoon sugar

1 Tablespoon onion powder

½ cup of water

Directions

Mix all the ingredients together in a gallon freezer bag with the chicken breasts and marinate for at least 2 hours or overnight. Take out of marinade. Add into instant pot on steamer shelf with about a cup of water and set to pressure cook for 10 minutes. Allow natural release for 5 minutes and then manually release the remaining pressure.

Now you have cooked chicken breasts to be able to add to whatever you like for the week. Roasting some veggies while the chicken is cooking, will lessen your load during the week even more.

Roasted Veggies

Ingredients

2 Tablespoons of olive oil

1 Green pepper, sliced into sticks

1 Yellow pepper, sliced into sticks

1 zucchini, sliced into sticks

1 pint of grape tomatoes, halved

1 teaspoon of salt

¼ teaspoon of pepper

¼ teaspoon of thyme

Directions

Toss veggies with olive oil and spices. Spread out on a sheet pan. Roast at 375 degrees for 30 minutes.

Here are some meal ideas with the chicken and veggies.

First Meal

This feeds 5-7 people

Greek Inspired Chicken Pasta

Ingredients

1 ½ cups of cooked chicken, cubed

Roasted tomatoes and zucchini

1 16 ounce box of pasta shells (small shells – I like Wegman’s gluten-free)

4 to 6 ounces of crumbled feta

Juice of ½ a lemon

Pasta water

Directions

Cook pasta according to instructions on package and save some of the pasta water. Pour the pasta in to a serving dish. Add chicken, tomatoes, zucchini and lemon juice and one ladle full of the pasta water. Mix. Add more pasta water if too dry. Stir in the feta and serve. Add fresh basil if you have some.

2nd meal – for one ( This was my lunch one day)

Baked Sweet Potato with chicken, roasted veggies and feta

Ingredients

1 Baked Sweet Potato

¼ cup of chicken, diced

A couple of roasted peppers

1 to 2 ounces of crumbled feta

Directions

Cut open baked sweet potato.  Add chicken, peppers and feta. Enjoy!

Baking the sweet potato in the oven is really my favorite way to cook it, but lack of time usually means that I make it in the microwave.

3rd meal feeds 4 to 5

Chicken Quesadillas

Ingredients

6 flour tortillas (my gluten free favorite is Joseph’s or Mission GF)

1 to 1 ½ cups of cooked chicken, chopped

Roasted green and yellow peppers

8 to 12 ounces of shredded cheddar

Directions

Preheat oven to 400 degrees. Spray sheet pan. Place cheese, chicken and peppers on one half of each tortilla. Fold other side over and cook about 6 to 8 minutes on each side.

If there are any chicken and veggies left, toss them into a salad with your favorite dressing.

What are your favorite meal planning recipes? Here are some of my other recipes that have great leftovers to help you out during the week! It is all about making our lives easier: What to do with leftover cod, Turkey Fried Rice  and Sweet Potato Two Ways.


Marinated Spinach and Artichoke Stuffed Chicken Breasts

Chicken can be found on the dinner table in many American homes on any given night. It can be easy to get into a chicken rut, making it the same way each time. It is just as easy to change it up however – marinate it, stuff it, roast it, brine it, fry it or cook it in the Instant Pot.

This recipe was developed because I was craving spinach and artichoke dip and had some chicken breasts to use. I decided to channel some of my stress and pound the chicken breasts flat with a meat mallet (you can also use a rolling pin) and stuff it with a version of my spinach and artichoke dip.

After going through a phase of brining chicken for the last couple of years, I decided to change it up. This marinade made the chicken so flavorful! It was even better the next day! This recipe made enough for 2 dinners for a family of 5 and plus a couple of leftover lunches during the week.

Marinated Spinach and Artichoke Stuffed Chicken Breast

Ingredients

  • 3.5 to 4 pounds of chicken breast flattened

Marinade

  • 1/3 cup olive oil
  • 2 lemons, zest and juice
  • 1 teaspoon salt
  • 2 sprigs fresh rosemary
  • 5 to 7 sprigs fresh thyme
  • 3 Tablespoons honey
  • 1 clove garlic

Stuffing

  • 6 ounces frozen spinach, thawed
  • 4 ounces cream cheese, softened
  • 1/2 lemon, juiced
  • 2 Tablespoons onion, minced
  • 6 ounce jar of artichokes, chopped
  • 3 Tablespoons red pepper, chopped
  • 1 teaspoon salt
  • 1/4 teaspoon pepper

Cooking the Chicken and Sauce

  • 2 Tablespoons olive oil
  • 1 1/2 cups chicken stock
  • 1/2 Lemon, juiced
  • Splash heavy cream
  • 6 ounces chopped tomatoes
  • 8 ounces Canned tomato sauce

Instructions

  1. Mix olive oil, lemon zest and juice, salt, rosemary, thyme, honey and garlic in a gallon freezer bag. 

  2. Add chicken and allow to marinate for 2 to 24 hours. 

  3. To make stuffing combine spinach, cream cheese, lemon juice, onion, artichokes, red peppers salt and pepper. 

  4. Remove chicken from marinade and pat dry.

  5. Place about 2 to 3 Tablespoons of filling in each flattened chicken breast and roll up. 

  6. Heat olive oil in large heavy bottomed sauté pan. 

  7. Sear the stuffed chicken on each side and then add chicken stock and lemon juice to the pan, cover and cook for 20 minutes in a 400 degree oven. 

  8. Take out of the oven, remove chicken and finish sauce with tomatoes, tomato sauce and a splash of cream. 

  9. Simmer sauce for about 5 minutes and return chicken to pan and serve over potatoes, zoodles or your favorite pasta.

What are your favorite chicken dishes? Here are some of my other favorites: One Pan Roast Chicken with Tomato Sauce, Spatchcocked Herb Roasted Chicken, Honey Lemon Roasted Chicken Thighs, Apricot Wings and Chicken Noodle Soup.

2018 Cooking Bucket List

Before I look forward to new cooking adventures in 2018, it is nice to look back at some of the new dishes I made in 2017. Even with my small hiatus from cooking over the summer, I almost finished my 2017 Cooking Bucket List. I love to cook, so making this list helps me expand my cooking horizons each year and learn a new cooking method or learn that some things are better eaten in a restaurant.

Some things went well and others not so well. I made gluten-free koeksisters, a South African fried dough, dipped in syrup. They were delicious, although a little dense. I’m going to have to work on the recipe a little more. I adapted the recipe to be gluten-free from Cook and Enjoy It from S.J.A de Villiers, a classic South African cookbook.

The egg yolk ravioli with homemade GF pasta was also yummy, though I only made 2 because the pasta was really challenging to work with. I think this is better eaten in a restaurant!

The gluten-free croissants also were just ok. I’ll have to try again.

The Dragon Ball I recreated from my favorite local sushi restaurant (Takara) was amazing! Hint, mine is on the left 🙂 I will definitely make it again at home. Costs about the same.

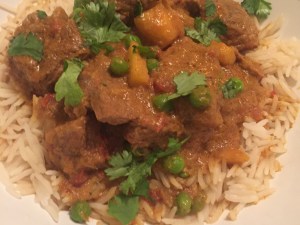
The Lamb Mango Korma wasn’t exactly made from scratch, but I used curry powder instead of making my own mixture, but it was definitely one of the kids’ favorites that I will make another time and share the recipe with you.

The gluten-free Yorkshire puddings were also a favorite, thanks to Nicole Hunn’s recipe from Gluten-free on a Shoestring.

I also made some fancier dishes. The Cornish Game Hens were so tasty but not something I would make for a regular meal, but save for a special occasion.  The Baked Alaska was actually easier than I thought, just very time consuming. The last thing I made was Indian Pudding. It is a cornmeal pudding that is in almost every New England cookbook I own. I combined recipes from Massachusetts: Recipes for All Seasons and NewEngland.com’s Plimoth Plantation’s Slow Cooker Indian Pudding.

I missed one item on the 2017 bucket list, homemade ginger beer, so I’ve added it to my 2018 list.

  1. Pavolva
  2. Poutine
  3. GF Ouma biscuit
  4. Mayonnaise
  5. Ginger Beer
  6. Crème Brulee
  7. Biltong
  8. GF Chocolate Lava Cake
  9. Avgolemono – Greek lemon chicken and rice soup
  10. GF Lobster Rolls

This year’s bucket list is a mixture of some more South African favorites from my youth, desserts and things I’ve attempted to make before but didn’t work out so well. This year I will finish them all!

Are you going to challenge yourself to make something new this year?  Any good recipes to share with me for one of my bucket list items? Happy New Year!

Best Recipes of 2017

Another year is almost over…and what a year it was! I am almost finished with my Cooking Bucket List from 2017. I have one more recipe to make, which I will make for New Year’s Eve. Stay tuned next week to learn how my bucket list recipes turned out and what is in store for 2018. For this week, here is a round-up of my best recipes of 2017. These are the most visited recipes by the readers…you!

  1. Favorite Meatball Recipes from 2016
  2. Overnight Baked Apple French Toast
  3. Meatballs, Plain and Simple
  4. Basic Chocolate Bark Recipe
  5. Nutella in a Smoothie? Yes Please!
  6. Gluten-Free Buttermilk Biscuits
  7. What to do with Leftover Cod
  8. Boston Cream Pie Cake
  9. French Onion Soup
  10. Balsamic Honey Mustard Sauce

Thanks for reading Mamma’s Cooking this year! Click here if you want to check out last year’s favorites. Looking forward to continuing to share new recipes with you and making good food that just happens to be gluten free! Happy New Year!

Easy Mushroom Sauce

When you want to spice up a meal or make it fancier, a good sauce can easily do that. Now, I am not a fan of mushrooms, but lately I have been using them more. They really give a great umami quality to your food. My son ate this sauce alone, for breakfast, the morning after I served it. It really is lick-your-plate delicious😊  Serve this sauce over your holiday roast, steaks, chicken or over some polenta for a comforting vegetarian dish.

Mushroom Sauce

Ingredients

2 Tablespoons of butter

1 Tablespoon olive oil

1 teaspoon fresh thyme, chopped

1 teaspoon fresh rosemary, chopped

1 teaspoon of onion powder

1 pound of your favorite mushrooms, chopped (I like baby portabellas or shitake)

1 packet of McCormick’s Gluten Free Brown Gravy

1 cup of veggie, chicken or beef stock

1 teaspoon of balsamic vinegar

Direction

Melt butter and heat oil in a sauce pan, over medium heat. Add thyme, rosemary and onion powder. Toss in your mushrooms and cook for about 5 minutes. Add gravy mix, stock and vinegar. Stir and cook for another 5 minutes and sauce is thick. Taste for seasoning.

What is your favorite sauce? Try some of my other sauces, one sweet and one savory.


Mango Banana Smoothie

After indulging in heavy foods over the holidays, a great smoothie is just the thing to help you feel better! I admit the novelty of my Ninja blender has worn off and after the first few months of smoothies every other day, they appear much less frequently. This however, is the most requested and blended smoothie in our house. It makes enough for  2 adults or 3 to 4 kids.

Mango Banana Smoothie

Ingredients

6 ounces of vanilla yogurt

½ frozen banana

½  cup frozen mango chunks

½ cup of milk

Directions

Throw all the ingredients in your blender. Blend until smooth and enjoy!

What is your favorite recovery food after the holidays, a vacation or other time spent eating more than you know you should? This Nutella smoothie is also a favorite in our house. Other than smoothies we go to soups. Check out my favorite soups here.

Pumpkin Tiramisu

The holiday season seems to be in full swing, judging by the 24 hour Christmas music on the radio in my car and the Christmas wreaths for sale outside the grocery store. How is it already Thanksgiving week?! I feel like I say this every year, but this year it seems to have come up faster than usual!

For the first time in many years, I am not hosting, just bringing dessert. Trying to keep the holidays as simple as possible this year. I am making this version of Tiramisu and maybe brownies, made from a box mix. Simple and stress free 😊

Pumpkin Tiramisu

Feeds 4 to 6 people

Ingredients

About 1 Cup of Simple Syrup, plus 2 cinnamon sticks

1 package of Schar gluten-free ladyfingers

4 ounces of mascarpone (you can omit this and double the amount of cream cheese)

4 ounces of softened cream cheese  (very important it is soft! Keep on counter for at least 2 hours)

½ cup of canned pumpkin

1 – 14 ounce of can of condensed milk

½ teaspoon of cinnamon

1/8 teaspoon fresh nutmeg

½  cup of heavy cream

Fresh whipped cream, see recipe below

Directions

Make simple syrup and let cool while you make the pumpkin mixture.

Whip together mascarpone and cream cheese or just cream cheese. Add in the pumpkin, condensed milk, cinnamon, nutmeg and heavy cream. Whip all the ingredients together for about 5 minutes with an electric mixer or standing mixer, starting on low and once there is no risk of splatter, turn on high.

Dip a ladyfinger into the simple syrup and place in a small rectangular dish, like this 6 cup Pyrex. Make a layer of syrup soaked lady fingers and then top with about half of the pumpkin mixture. Top the pumpkin mixture with half of the whipped cream. Repeat.  Sprinkle with a little cinnamon on top if you like. Chill for at least 3 hours. Serve. This can be made the day before and kept in the fridge.

Fresh whipping cream

1 cup heavy whipping cream

2 Tablespoons of powdered sugar

½ teaspoon vanilla

½ teaspoon of cinnamon (optional)

Check out some of my other holiday dessert ideas: Raspberry Lemon Thyme Tiramisu, Boston Cream Pie Cake, Chocolate Chip Peanut Butter Mousse Pie and Apple Crisp! For a great hostess gift, make some chocolate bark. What is your favorite holiday dessert?


Overnight Baked Apple French Toast

Last week I shared my gluten-free crouton and stuffing recipe, using the ends of bread that I keep in the freezer. This week, I have another great meal for you that can be made from the same ends or your favorite bread. What is better on a weekend or holiday morning than to wake up to the smells of apple and cinnamon?

Gluten-Free Overnight Baked Apple French Toast

Ingredients

  • 5 cups bread cubed
  • 2 apples finely chopped
  • 2 Tablespoons butter
  • 4 Tablespoons sugar
  • ½ teaspoon cinnamon
  • 2 cups milk
  • 3 eggs
  • ¼ teaspoon cinnamon
  • 1 teaspoon vanilla
  • 4 Tablespoons of brown sugar

Instructions

  1. Add bread to your slow cooker. 

  2. In a sauté pan, cook apples, butter and sugar with cinnamon for about 5 minutes. Pour mixture over bread in the slow cooker.

  3. In a bowl or large measuring cup whisk milk, eggs, cinnamon, vanilla and brown sugar. Pour over bread and apple mixture. 

  4. Cover and cook on low for 7 to 8 hours.

Having breakfast already made when you get up in the morning, especially when you have house guests or are going to be running around for the day, helps to take the stress out of the morning. This one will disappear fast 🙂

What is your favorite easy breakfast? Check out my round-up of gluten-free breakfast ideas! Frittatas, muffins and a breakfast pizza! Oh my!

Don't miss a recipe! Follow me in any or all formats you like!